A fundamental question when going on a photography trip is where to take photos from. Now I don’t do extensive research before I go on a trip, but I do have a quick look so I get a general idea of what I will be wandering around.
So the fundamental question is this – is the caldera one of the best Santorini photo locations? In my opinion clearly this is a yes – I took all the photos on this website on the caldera, and only left the caldera (reluctantly) to go home!
Why do I like this photo so much?
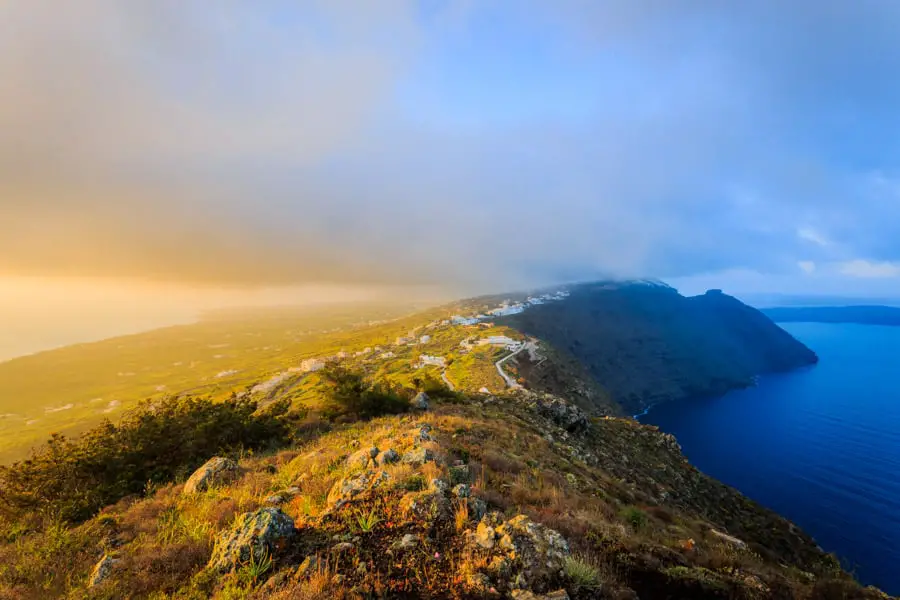
Simple. It is the first image that I have captured which shows so clearly the different colour temperatures before sunrise and during sunrise in one image. To the right the light is cold and blue, and to the left you can clearly see the warmth provided by the rising sun. And you can also see the transition from cold to warm in the clouds in the sky.
I have never captured this before in one image in quite such a dramatic way – that was the beauty of the location I was taking the photo from. And the beauty of taking photographs on the wonderful Greek Island of Santorini. Every day on Santorini the sunrise was different – it was quite amazing to witness.
The image also gives a great representation of the topography of the island, with the buildings visible on the top of the caldera to the west, with the island gradually falling down to the sea to the east.
And it also shows the value of getting up early in the morning and getting out there! Even on holiday I love doing this.
Sorry that reminded me – my favourite images tend to be ones taken at sunrise, which is my favourite part of every day. There is something special about being the only one out there watching a new day unfold.
How did I decide on this composition?
I had already walked past this location and made a mental note of the unrestricted view of Imerovigli and so much of the island. I was up and about early that morning and quickly found this spot again.
I realised that from this viewpoint I could show the topography of the island from a different angle, as well as the coastline on both sides of the island. To be honest I have not seen this particular view before. Not that I do extensive research before I visit a location.
I wanted to show the contrast in the coastlines, the east coast having gentle sloping land down to the sea, with the west coast consisting of steep plummeting cliffs.
I wanted to show the shape and size of the caldera on the main island.
I also wanted foreground content which showed the terrain away from the built-up areas.
I wanted to represent Santorini in one photograph.
Where was the photo taken?
The photo was taken from the top of the caldera, right where the number five is on the Lightroom Map extract.
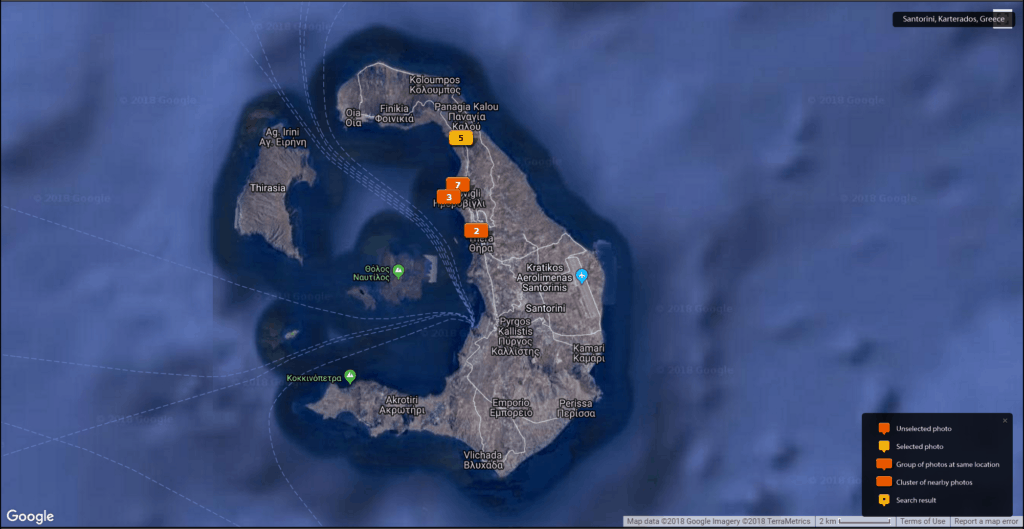
This is a great location to take photos from – just to the left is the church that features in some of my other images you can see on this website.
This is one of the reasons why GPS in a camera is so important in my travel photography – I can see exactly where I took every photo which is invaluable in the work that I do.
And also the reason I scout my own locations so I get the compositions that I want, and not the headline shots that everyone else seems to go for.
What time of day was the photo taken?
Just after 6am in the morning. I was up long before 4am on this morning as I knew where I was walking to for the sunrise.
What photography gear did I use to get the shot
- Canon 6D
- Canon 17 – 40mm F4 L Lens (focal length used 17mm)
- Manfrotto 190 Go tripod with geared head
- Loupe Viewer
- My red hat
- Oakley sunglasses
- Pepsi Max
- Red shoes (feet already acheing by now)
What camera settings did I use?
- Aperture F16
- Shutter speeds 1/50th second, 1/200th second and 1/13th second.
- ISO 400. I was surprised that I used an ISO of 400. But thinking about it the clouds were moving, and I didn’t want the shutter speed too slow or I would have got blur in the clouds. ISO 400 on the Canon 6D really isn’t a problem – the sensor can give a super clean image at this sensitivity.
- Back-button focus
- AV Mode
- 10 second self-timer
- RAW format
One interesting fact about the image.
Well the range of colour temperatures for one thing – I have never captured them quite like this before. Other than that no dramas on this shoot.
Is there a behind the scenes video of this shoot?
Yes – there is the 360 view I captured using my iPhone not long before the image was taken. You can check it out on YouTube.
How did I process the image?
Firstly I merged the three images together in Lightroom to create a single image.
The challenge with this image was to get the white balance correct, as I had two colour temperatures in the same image – talk about mixed lighting!
To get the white balance correct I used the eye dropper tool and selected a neutral part of the clouds, which I found in the end! I went to the middle of the image, where the two light sources met. All you need to do is move the eye dropper tool over what looks like a neutral part of the picture, and get the three numbers as close as possible, and then click and tht is that done!
After that processing was done in the Basic Panel in Lightroom, which I did using the Vibrance slider before moving on to the HSL Panel. Here I played around with the colours and luminances – what I was trying to recreate was the scene that I remember seeing with my own eyes. I can still picture that wonderful scene with the warm light to the left and the cold light to the right – such a stunning natural occurrence.
I finsihed off the image with a bit of cleaning up in Photoshop, removing sensor dust spots and irritations around the edges – no major editing to be fair.
What could I have done to improve the image?
Hmmm. Well I could have moved somewhere else and got a lovely white church in the foreground but I wanted to convey the topography of the Santorini caldera without a building in the composition.
I am after all looking to capture a range of images, not throw everything into every image.
Less is more.
And to be honest I am very happy with this image.
And what are my thoughts on this image?
I like this image a lot. Once I had selected the first 20 images for this website this was the first one that I uploaded. This is one of my favourite photos of Santorini.
I love the two colour temperatues in the image – I have never captured these before.
And I also like the fact that in one image I am showing the contrasting landscape, with the gentle slope to the east and the cliffs of the caldera to the west. You can just see the white buildings of Imerovigli on the top of the caldera in their spectacular, iconic Santorini location.
I wanted an image that told the story of Santorini in one image, and also an image that was different from most of the photos of Santorini that you see on the internet.
Enough of me – what do you think of this image?
Yep what do you think? Please let me know as at the end of the day I have an emotional attachment to this photo.
And I really do appreciate feedback on my photographs.
One last thing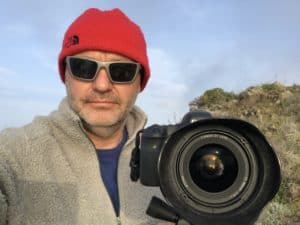
If you want to buy this image, or want to speak to me about future collaboration email me at sales@rickmcevoyphotography.co.uk.
Rick McEvoy ABIPP – Photographer, writer, blogger